Ski Sharpening for Beginners
Sharpening your own skis – The basics of ski preparation simply explained
Many skiers regularly take their skis for service, even though many maintenance tasks can easily be done themselves. With a little practice, the right tools, and a basic understanding of ski preparation, you can maintain your skis yourself and significantly improve their performance.
Sharp edges ensure more control and safety on the slopes. At the same time, regular ski servicing helps to reduce wear and extend the life of your skis.
In this guide, you will learn the basics of ski sharpening and discover what tools you need and which steps are particularly important.
Why should you sharpen skis regularly?
Enormous forces act on the steel edges when skiing. Especially on artificial snow, icy slopes, and hard race tracks, the edges wear down over time.
Worn edges often lead to:
- poorer edge grip
- unclean turning behavior
- higher effort
- less control on ice
- an insecure riding feeling
Regular sharpening keeps the edges sharp and the ski reacts precisely to every movement.
Basic equipment
What do I need for my ski service
Here, we have put together a minimalist set that includes everything you need to start your own ski service:
- sturdy ski vises
- brake retainers
- brass brush
- sidewall planer
- angle guide
- medium file
- diamond file
- oxide stone
- brass file brush
- edge rubber
- paste wax
- cork
- horsehair brush
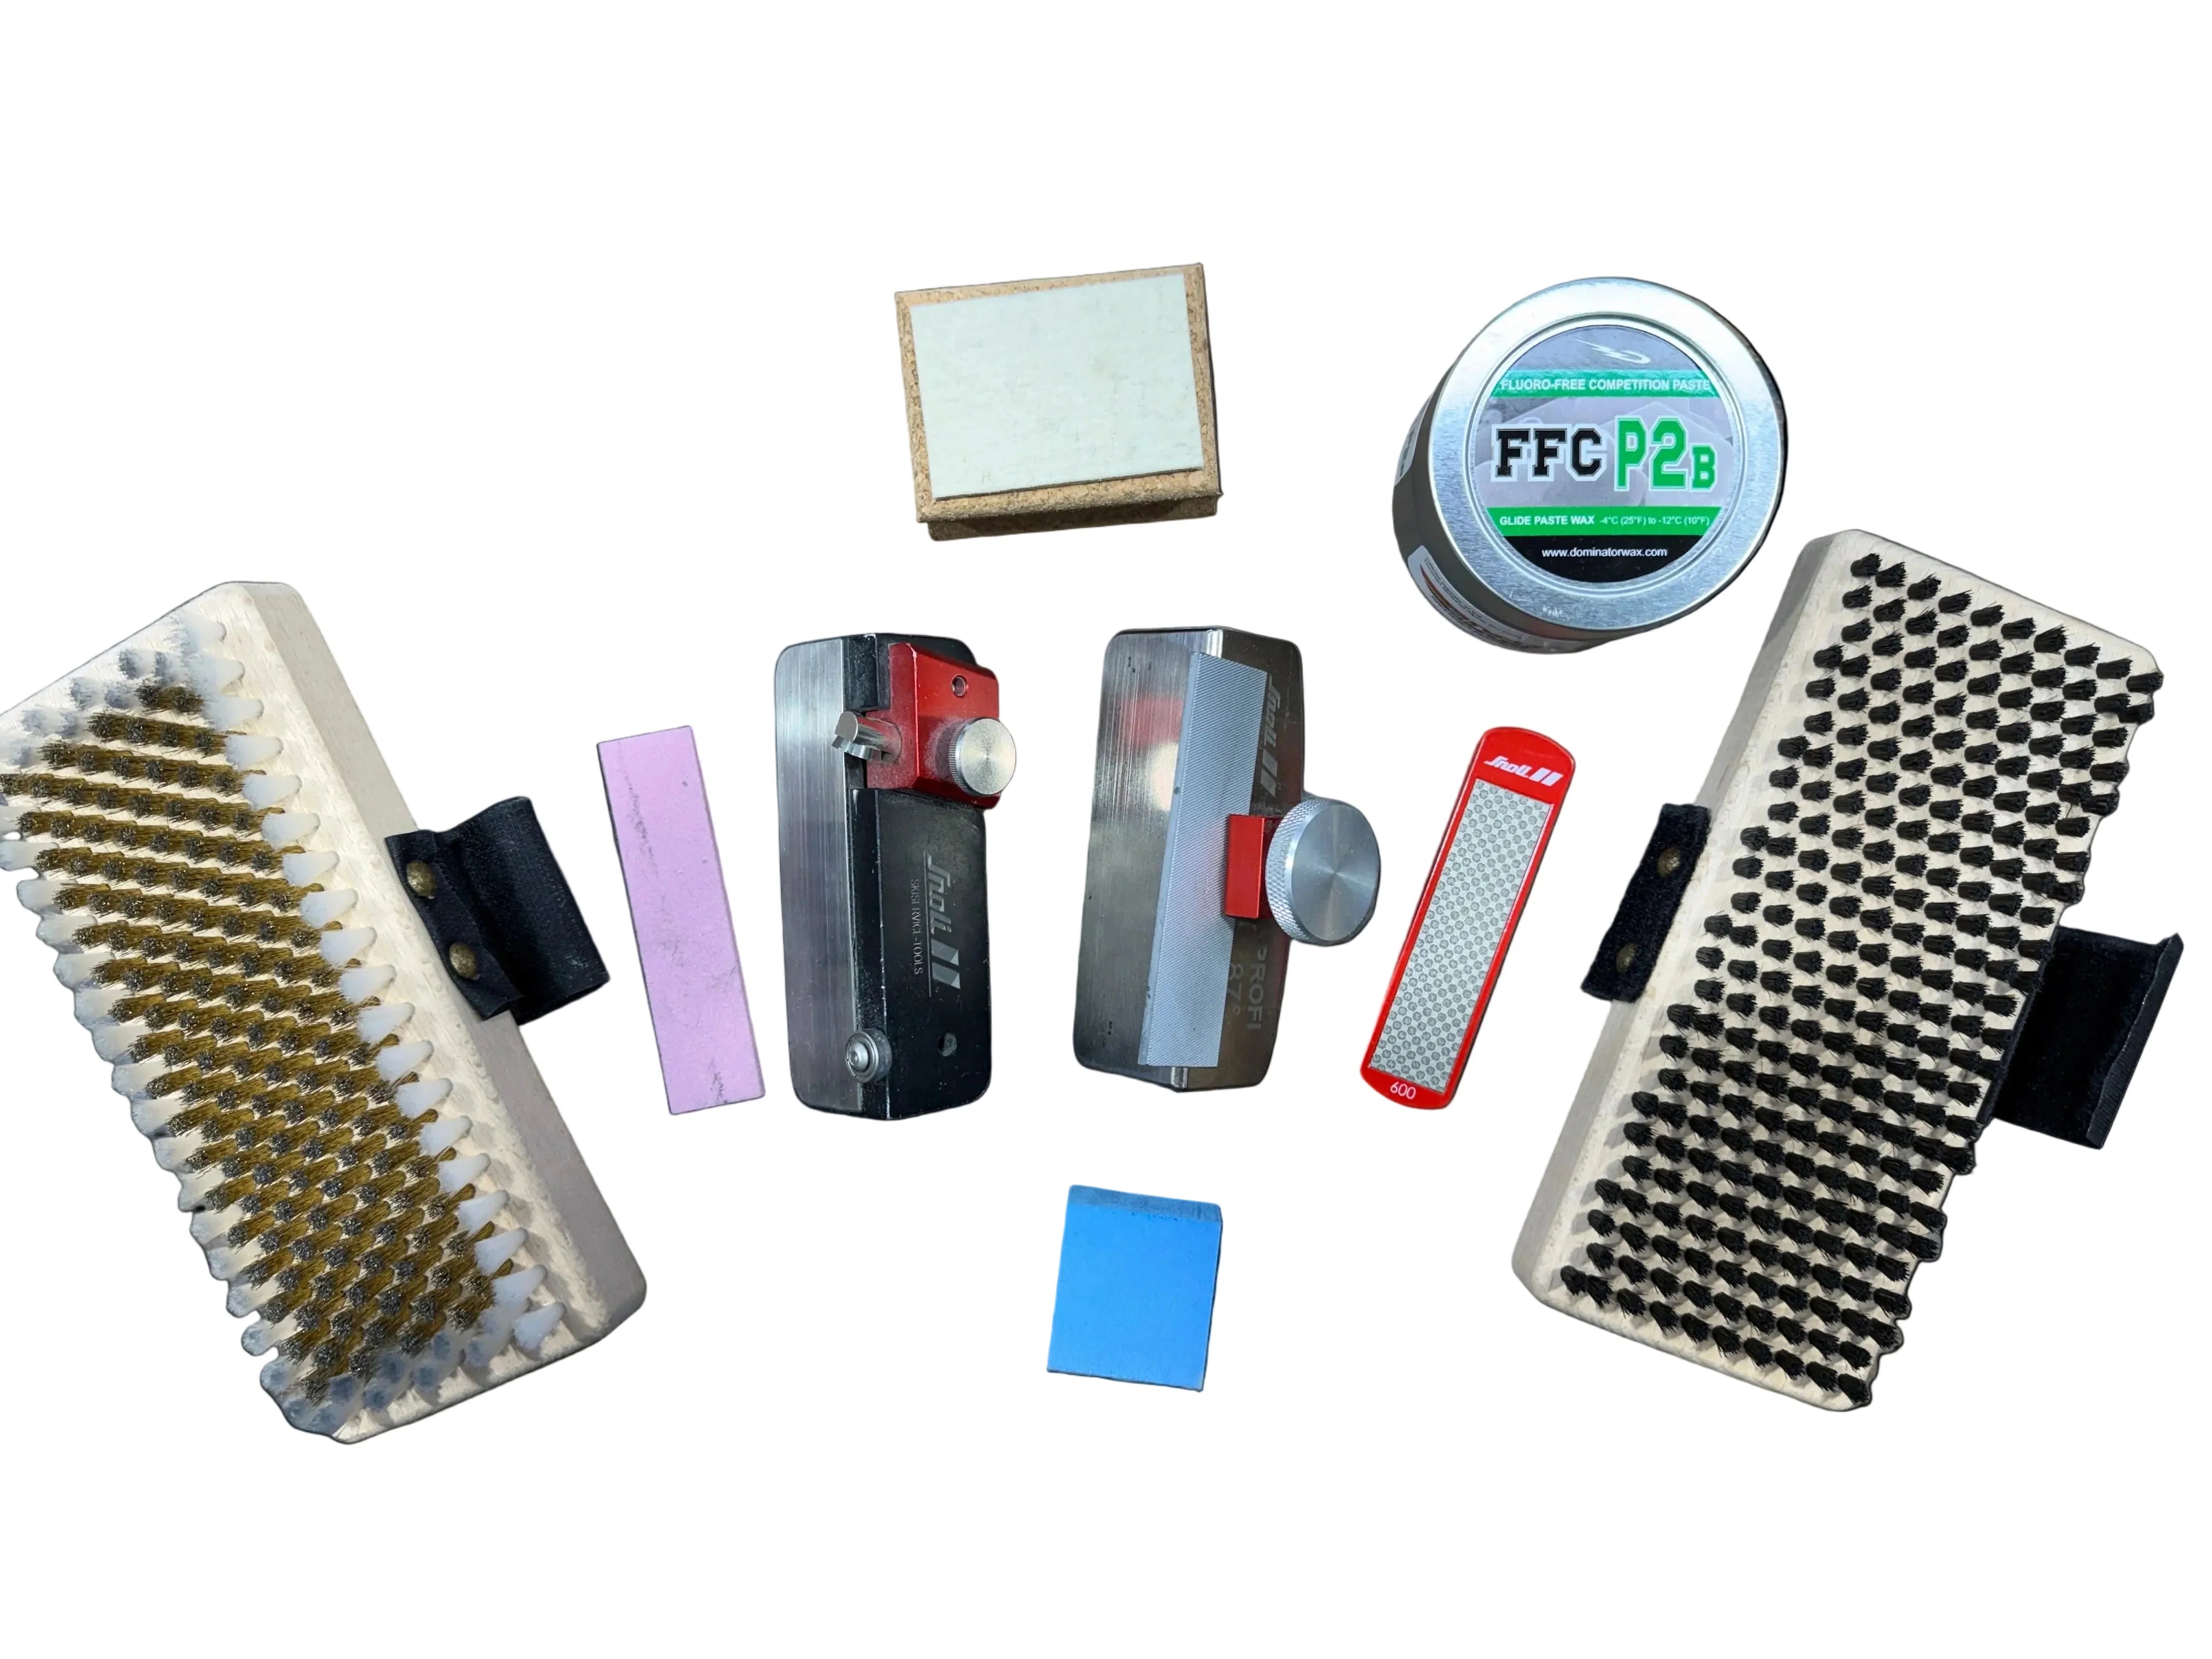
With this basic equipment for your ski service at home, you can properly clamp the skis, prepare the sidewall, sharpen and polish the edges, and wax and brush your skis.
What work is involved in a ski service?
A complete ski preparation consists of several steps:
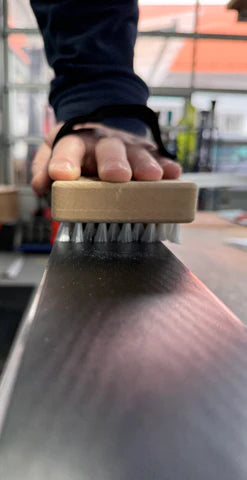
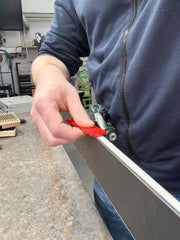
1. Cleaning the skis
Before any work, dirt, wax residues, and deposits should be removed.
Place the ski base-up in the ski vice. Brush the base thoroughly with the brass brush from front to back. This will remove dirt and residues.
2. Check edges
Check the edges for:
- Rust
- Burrs
- Damage
- Dull spots
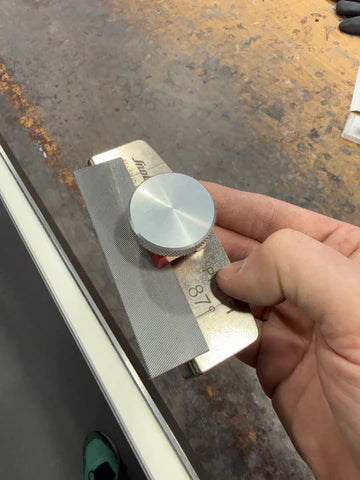
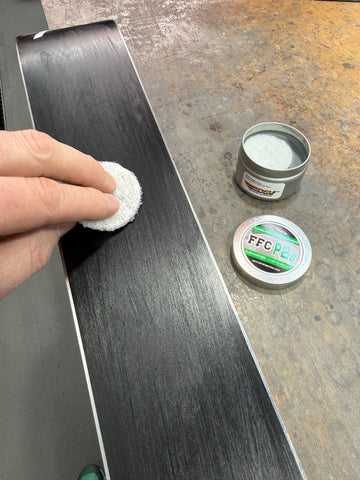
Light rust can often be removed with a knot eraser. Burrs can be removed with a diamond file. More severe damage or hardening, e.g., from stones, can be worked on with aluminum oxide stones.
Important: Aluminum oxide stones should always be used wet!
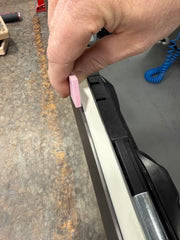
Above you can see how to apply the Oxyd stone to the bottom edge.
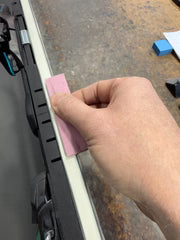
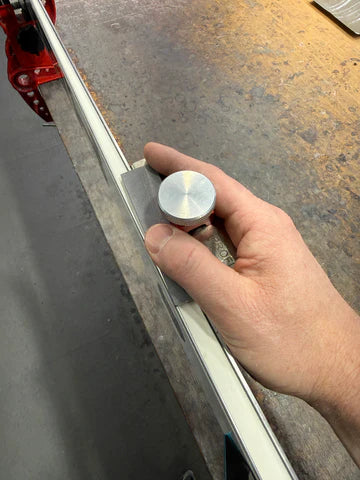
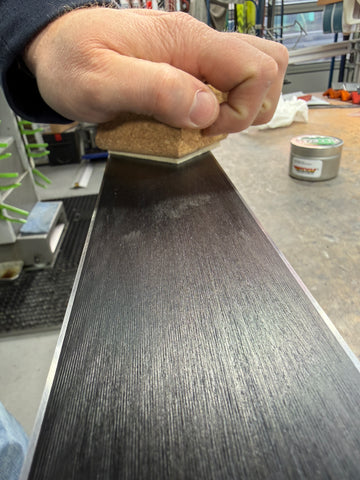
Above you can see how to use the Oxyd stone on the side edge. The Oxyd stone could also be clamped into the file holder here.
3. Sharpen edges
Depending on their condition, the edges are sharpened or rebuilt.
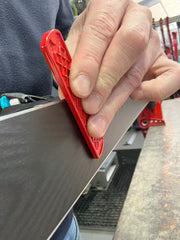
As a first step, you need to check whether the Titanal and plastic along the edge have been cut back enough. The Titanal or plastic along the edge should slope outwards and not be flush with the edge so that we can later grind the edge to the correct angle.
The image shows how the side wall cutter must be positioned and adjusted.
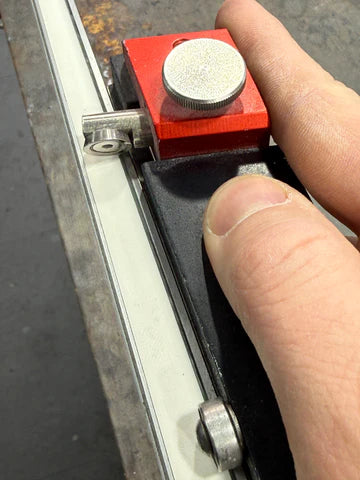
In the next step, we clamp the file into the angle. It is important to ensure that the file is clamped slightly diagonally so that the grinding swarf does not fall onto the base.
Important: The file should only be clamped diagonally enough so that both ends of the file are still above the edge.
Below you can see how the file should be clamped.
Now, the edge is sharpened evenly along its entire length. It's best to draw the edge with consistent pressure and strokes of equal length. Consistent pressure, working length, and speed are crucial for ensuring the edge is equally sharp along its entire length.
Below, you can see how the angle is applied and held against the edge.
Here you can find more detailed information about basic ski preparation and when to best use which files.
4. Polish edges
Diamond files are used to remove burrs and smooth the edge.
First, place the diamond file on the base-side edge so that the diamond just barely rests on the base. Now run the diamond along the edges once forward and once back.
Here you can see how to position the diamond.
We now perform the same work step on the side edge. Apply diamonds evenly and pull off the edge once in both directions.
The ridge should be gone now. If not, simply repeat the step.
5. Wax skis
After grinding, the base should be treated with ski wax.
To prepare for waxing, we first clean the base again. To do this, we brush the ski evenly from front to back with the brass brush, just like at the beginning. We remove any remaining dirt on the base with a cloth.
Apply the wax paste evenly and thinly to the base using the enclosed sponge. Afterwards, you should immediately clean the edges with a cloth to prevent the wax from drying there.
The paste should dry for about an hour.
After about an hour, we check whether the wax has dried sufficiently; if it no longer smears when touched, it can be processed further.
For this, we take a cork and polish the wax until the structure is clearly visible again.
In the last step, brush the ski with the horsehair brush from front to back. This will free up the structure nicely and allow the ski to glide optimally.
What tools do you need?
A basic set of equipment is sufficient to get started.
Edge Tools
For precise angles and consistent edge preparation.
➡️ View Edge Tools →
Files
For the actual sharpening of the edge.
➡️ View Files →
Diamond Files
For fine-tuning and polishing.
➡️ View Diamond Files →
Brushes and Wax Tools
For subsequent base care.
➡️ View Wax Tools →
The most common mistakes when sharpening skis
Removing too much material
Many beginners file too aggressively, which shortens the edge's lifespan.
Incorrect angle
Unsuitable angles lead to poorer edge grip and unstable handling.
Too much pressure
The file should be guided evenly. Too much pressure worsens the result.
No finishing
After filing, burrs must be removed with a diamond file.
Which edge angles make sense?
For most recreational skiers, the following values have proven effective:
All-round
- Side edge: 88°
- Base edge: 0.9°
Sporty
- Side edge: 87°
- Base edge: 0.7°
Racing
- Side edge: 87° to 85°
- Base edge: 0.3° to 0.7°
The optimal setting depends on riding style, snow type, and area of use.
When should skis be professionally sharpened?
Minor maintenance work can easily be done yourself.
However, professional machine grinding is recommended for:
- severely damaged edges
- major base damage
- new skis
- fundamental structural work
After that, regular maintenance can be done yourself again.
Ski grinding and ski waxing go hand in hand
A sharp edge alone doesn't make a ski fast.
Only the combination of:
- clean base structure
- sharp edges
- suitable ski wax
- correct processing
ensures optimal performance on snow.
Therefore, also use our Academy areas:
FAQ
Frequent questions about sharpening ski edges yourself
Yes. With the right tools and a little practice, many maintenance tasks can easily be carried out yourself.
For getting started, we recommend a high-quality universal file combined with a diamond file for finishing.
Depending on use, the edges should be checked every two to four ski days and resharpened if necessary.
Costs vary depending on the scope of work. Smaller maintenance tasks can often be saved through self-performance.
Diamond files are used for deburring and polishing the edge surface after grinding.
With good instructions and suitable tools, even beginners can quickly achieve clean results.
However, ski servicing is a real craft and requires some practice.
Further Topics